1.0 Why Should I Use the UART on the Raspberry Pi?
We are going to start out by establishing a connection to the Raspberry Pi 4 over the Universal Asynchronous Receiver-Transmitter (UART) interface. The UART is one of the most useful—and nowadays, perhaps, underutilized—ways to talk to a processor running Linux. The primary UART is typically the device mapped to the file at /dev/ttyS0. The "tty" stands for TeleTYpewriter. Historically it was the primary way of displaying text from a computer, and it still comes with some great benefits that an SSH or Telnet session does not have. Namely, printing boot log messages and printing kernel messages.
1.0.1: It Prints Out Boot Log Messages
The number one benefit of hooking up to the Raspberry Pi 4 over the UART is that you get to see the wealth of debugging information that is printed out when Linux first tries to boot. When your bootloader loads Linux, it will look for a configuration file that tells it where it should print the boot log messages. On a native Raspberry Pi installation, this file is called cmdline.txt. It has one line that looks like this:
dwc_otg.lpm_enable=0 console=serial0,115200 console=tty1 root=PARTUUID=698e33bd-02 rootfstype=ext4 elevator=deadline fsck.repair=yes rootwait init=/usr/lib/raspi-config/init_resize.sh splash plymouth.ignore-serial-consoles
The two entries with "console=" tell it which console is should use for printing out the boot log messages and how it should be configured. The 115200 indicates it will be using 115,200 baud, and the tty1 tells it that it should use the device at /dev/tty1.
There will be times when you are trying to modify the kernel or the device tree and things just won't boot up properly. The boot log messages will help you figure out what's going wrong. I'll show an example of this shortly.
1.0.2: It Provides a Shell That Prints Kernel Messages
Another invaluable aspect of the serial console within Linux is that it provides an easy way to connect with a board that doesn't have its network interface or display drivers properly configured. Once you get Linux up and running, you can interact with it over this console to type commands, read files, etc.
When you plug something in and a kernel module is loaded, or when a driver prints a warning or error message, you will see all of these messages appear on the console attached to the UART. This can be very helpful while trying to debug new hardware that you're attaching.
1.1: How Do I Connect to the UART?
In order to get the kernel messages during boot to print out the UART, you need to:
- Go out and get a 3.3V USB-to-serial converter (see below for details to make sure you don't get the wrong type of converter), and then attach the GND, TX, and RX pins to the UART GPIO pins on the J8 header.
- Enable the UART in the boot configuration files.
- Enable verbose booting so that the kernel messages are not supressed.
In this section, I'm only going to talk about step 1. The 3.3V USB-to-serial converter I ended up going with is EZsync FTDI Chip USB to TTL Serial Cable for Rapsberry Pi, 3.3V, TTL-232R-RPI Compatible, Debug and Programming Cable, EZSync012. There are plenty of other converters out there, and I'm sure they all work well. But I was pretty happy at how easy it was to get the drivers working both on my Mac and within my Ubuntu VM running on Virtual Box for this one, so I'd definitely give it a good recommendation.
Once you get your connection set up in Step 1, it should look something like this (Black is GND, Yellow is RX, and Orange is TX on the EZsync cable):
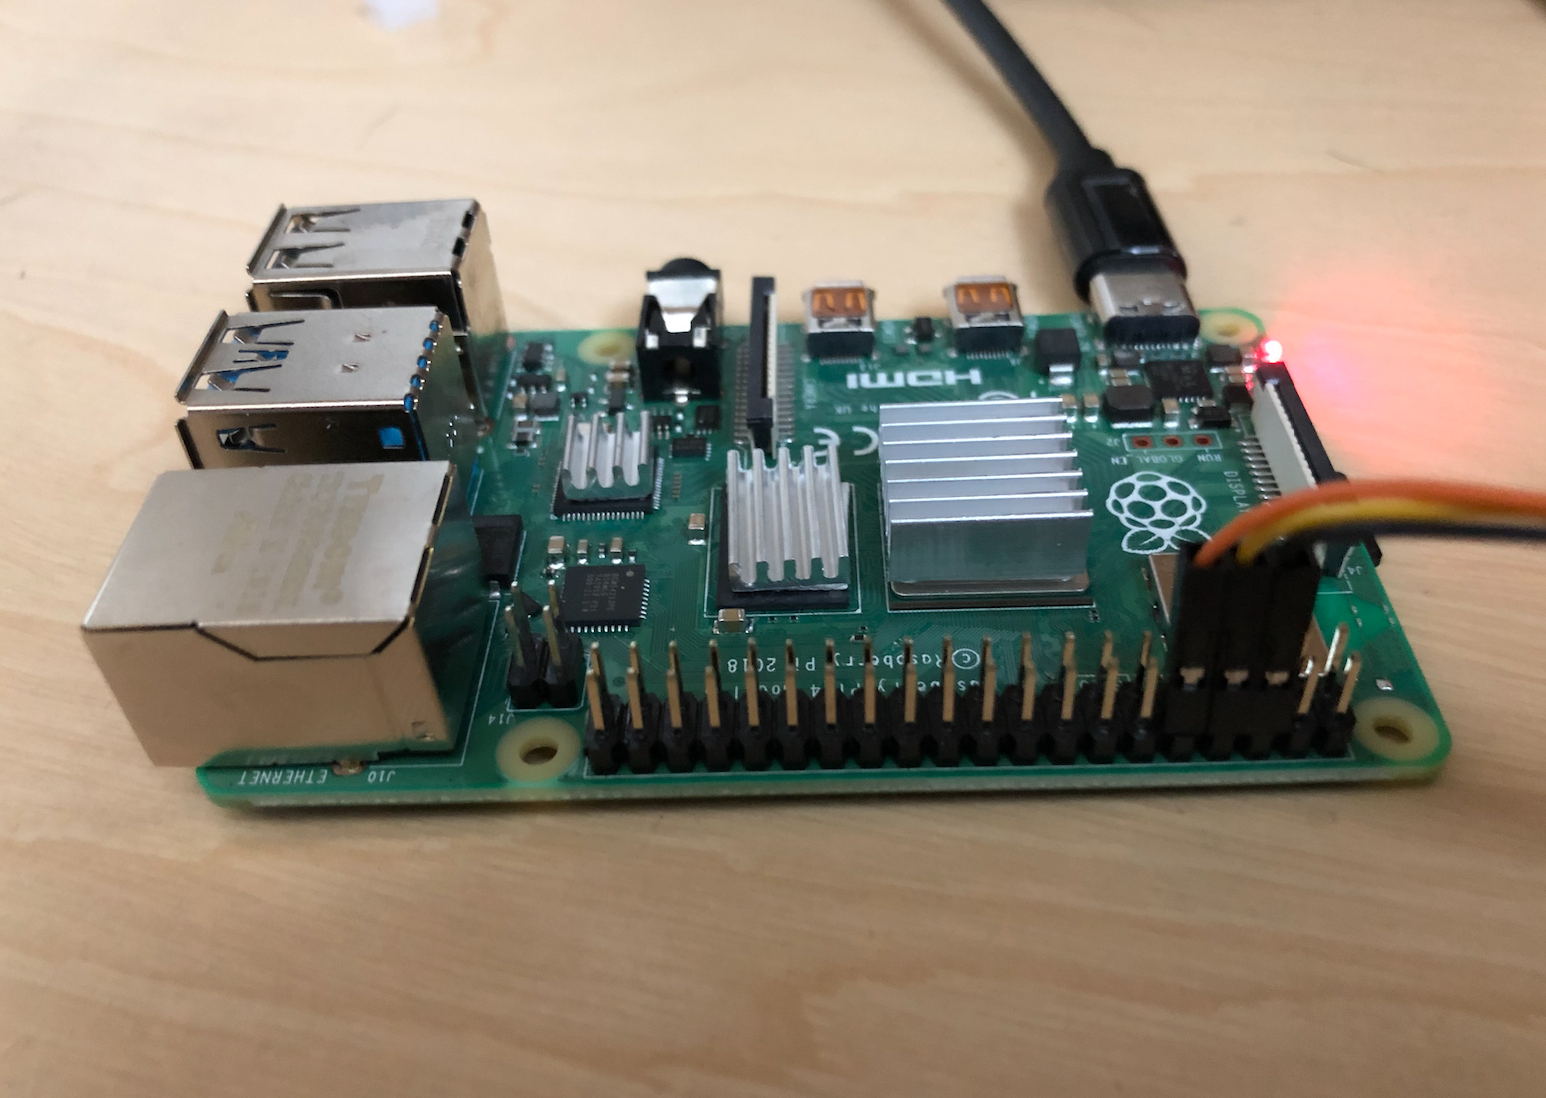
Figure 1: Raspberry Pi 4 with primary UART hooked up on the GPIO header.
Note that I'm not attaching any other peripherals like keyboard, mouse, or screen. I'll only be talking to the board through the UART and the Ethernet connector, as is typical with embedded system development).
To do steps 2 and 3, we'll have to load some files onto our SD card, which needs to be properly formatted. We'll cover the formatting and partitioning in the next section.
1.2: Which Program Should I Use to Communicate with the UART?
There are a ton of options here. On Mac or Linux, I usually just use the screen utility. On Ubuntu it comes with a simple sudo apt install screen. To make a connection to the USB-to-Serial converter, it only takes one line similar to this:
$ sudo screen /dev/tty.usbserial-AO008799 115200Your command may be different based upon where your USB-to-serial converter is mapped to.
IMPORTANT: Using the Wrong USB-to-Serial Converter
USB to serial converters have been around a long time, and you may very well have one sitting around in your bottom drawer for this exact purpose. But there is a good chance this won't work. Older USB-to-serial converters use 5V TTL logic. The UART on the Raspberry Pi uses 3.3V CMOS. You have to make sure that your USB-to-serial converter uses 3.3V logic.
If you happen to be one of the poor suckers that tries to plug in that old converter (like me), you'll get gibberish even if you have the baud and other settings configured correctly. Here is what the output of the kernel messages during the boot sequence looked like for me.
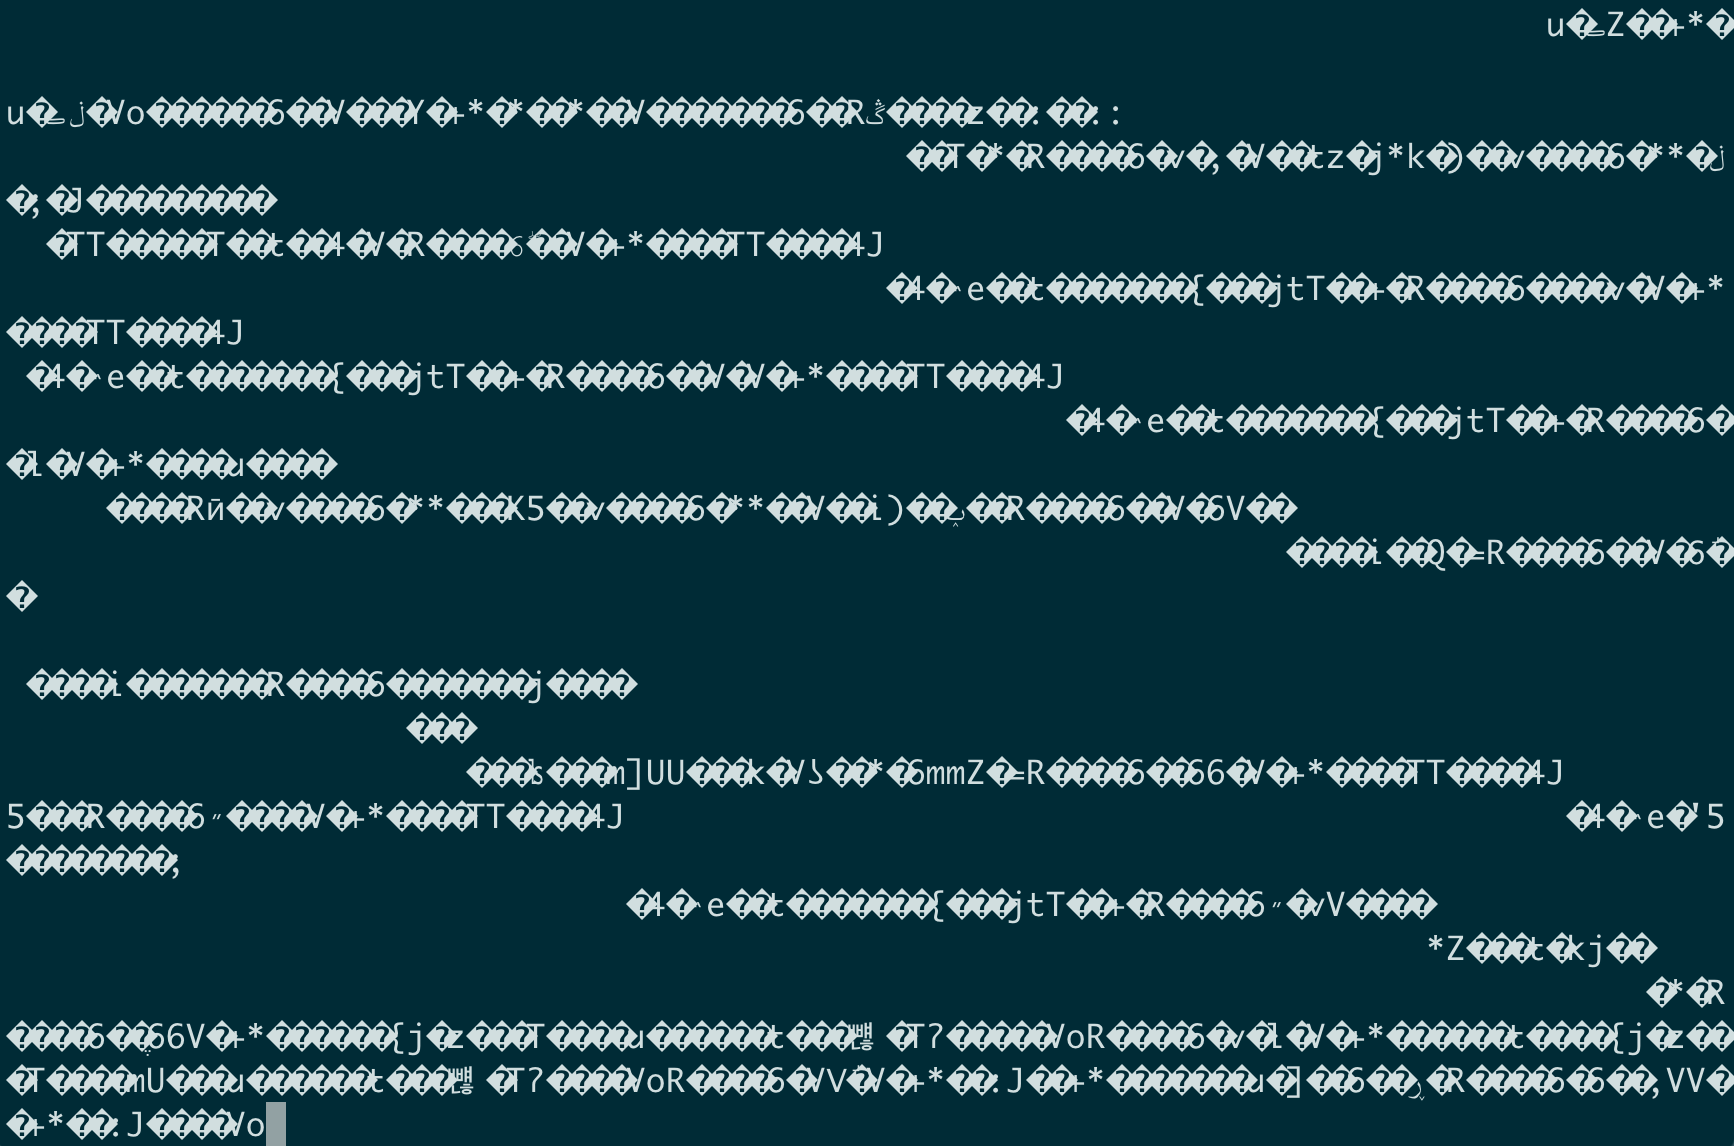
I was using the Tera Grand RS232 Serial DB9 Converter when I was seeing this nonsense. If your converter has RS232 in the name, it probably won't work since that protocol uses 5V swings.
I ended up ordering the EZsync FTDI Chip USB to TTL Serial Cable for Rapsberry Pi, 3.3V, TTL-232R-RPI Compatible, Debug and Programming Cable, EZSync012, and this one works right out of the box. I did not even have to download any drivers on my Mac.
← Previous ... Next →