8.0 Getting the SD Card Ready to Boot
In this section, we'll copy over all the files we just built over to the SD card and set up the boot files to get a working implementation of Linux. If you need help partitioning your SD card, follow the instructions in Section 2.
8.1 Formatting and Partitioning Our SD Card
If you've been following along the whole way, you've already partitioned the SD card with a BOOT and ROOT partition, and the partitions are populated with some pre-compiled binaries and config files. If not, follow all the steps from Section 2.0 to Section 2.3. You should have an empty SD card with the two partitions specified above.
8.2 Copying Over Files
You should now have an SD card with the two empty BOOT and ROOT partitions mounted on your VM or host OS at /media/BOOT and /media/ROOT. You should also have all of the files we just built with bitbake ready to go. Now we're going to copy over the all the necessary files and make some edits to get a working, bare-bones version of Linux running on the Raspberry Pi 4. Here are the steps we need to take:
Step 1) Copy the Device Tree Blob to BOOT
$ cd ~/Yocto/poky/build/tmp/deploy/images/raspberrypi4-64/
$ cp bcm2711-rpi-4-b.dtb /media/BOOT/
Step 2) Copy the Linux Kernel to BOOT
$ cp Image /media/BOOT/kernel_rpilinux.imgStep 3) Decompress the Root Filesystem to ROOT
$ cd /media/ROOT/
$ sudo tar -xjf ~/Yocto/poky/build/tmp/deploy/images/raspberrypi4-64/rpilinux-image-raspberrypi4-64.tar.bz2
Step 4) Copy the Raspberry Pi4 Firmware to BOOT
$ cd ~/Yocto/poky/build/tmp/deploy/images/raspberrypi4-64/bcm2711-bootfiles
$ cp * /media/BOOT/
Step 5) Verify BOOT/config.txt
The config.txt file in boot should have the following lines:
kernel=kernel_rpilinux.img
arm_64bit=1
enable_uart=1
A few quick notes on this: kernel=kernel_rpilinux.img tells the bootloader in the Raspberry Pi EEPROM to load the kernel contained in kernel_rpilinux.img. arm_64bit=1 is necessary to ensure that the 64-bit capability of the ARM proccessor is enabled (it should work without this, but I could not get it to load the 64-bit kernel without it). Lastly, enable_uart=1 enables the UART that we're using to communicate with the device initially.
Step 6) Verify BOOT/cmdline.txt
The cmdline.txt file in boot should have the following lines:
dwc_otg.lpm_enable=0 console=serial0,115200 console=ttyS0 root=/dev/mmcblk0p2 rootfstype=ext4 elevator=deadline fsck.repair=yes rootwaiNOTE: we're not using the PARTUUID specifier to designate our boot and root partitions like we did in Section 2.3. This time, we're using the device file at /dev/mmcblk0p2 since it does not require us to change
Step 7) Edit etc/fstab in ROOT
Lastly, we need to make sure that /etc/fstab contains the correct partitions for our system. Navigate to the file using vi /media/ROOT/etc/fstab and populate the file like so:
proc                    /proc           proc    defaults          0       0
/dev/mmcblk0p1          /boot           vfat    defaults          0       2
/dev/mmcblo0p2          /               ext4    defaults,noatime  0       1
This time we aren't using the PARTUUID specifiers for our two primary partitions, so this should be extensible to any old SD card we populate.
The astute reader may be saying, "But we still have to manually edit /etc/fstab by hand! Doesn't this go against the whole Yocto philosophy of building a customized Linux kernel and filesystem out of the box?" To that I would say, "Yes, it does. But just hang with me for a second." In the next section, we'll write a recipe to produce this exact /etc/fstab file in our build using bitbake.
Step 8) Pop the SD card into the Raspberry Pi and Boot Up
Now that we've got everything in place in our BOOT and ROOT partitions on the SD card, we're ready to fire it up. If you've got your UART set up properly (see Section 1) and a terminal program waiting for text. You should be able to just press the power button and see the kernel messages print out. The end should look something like:
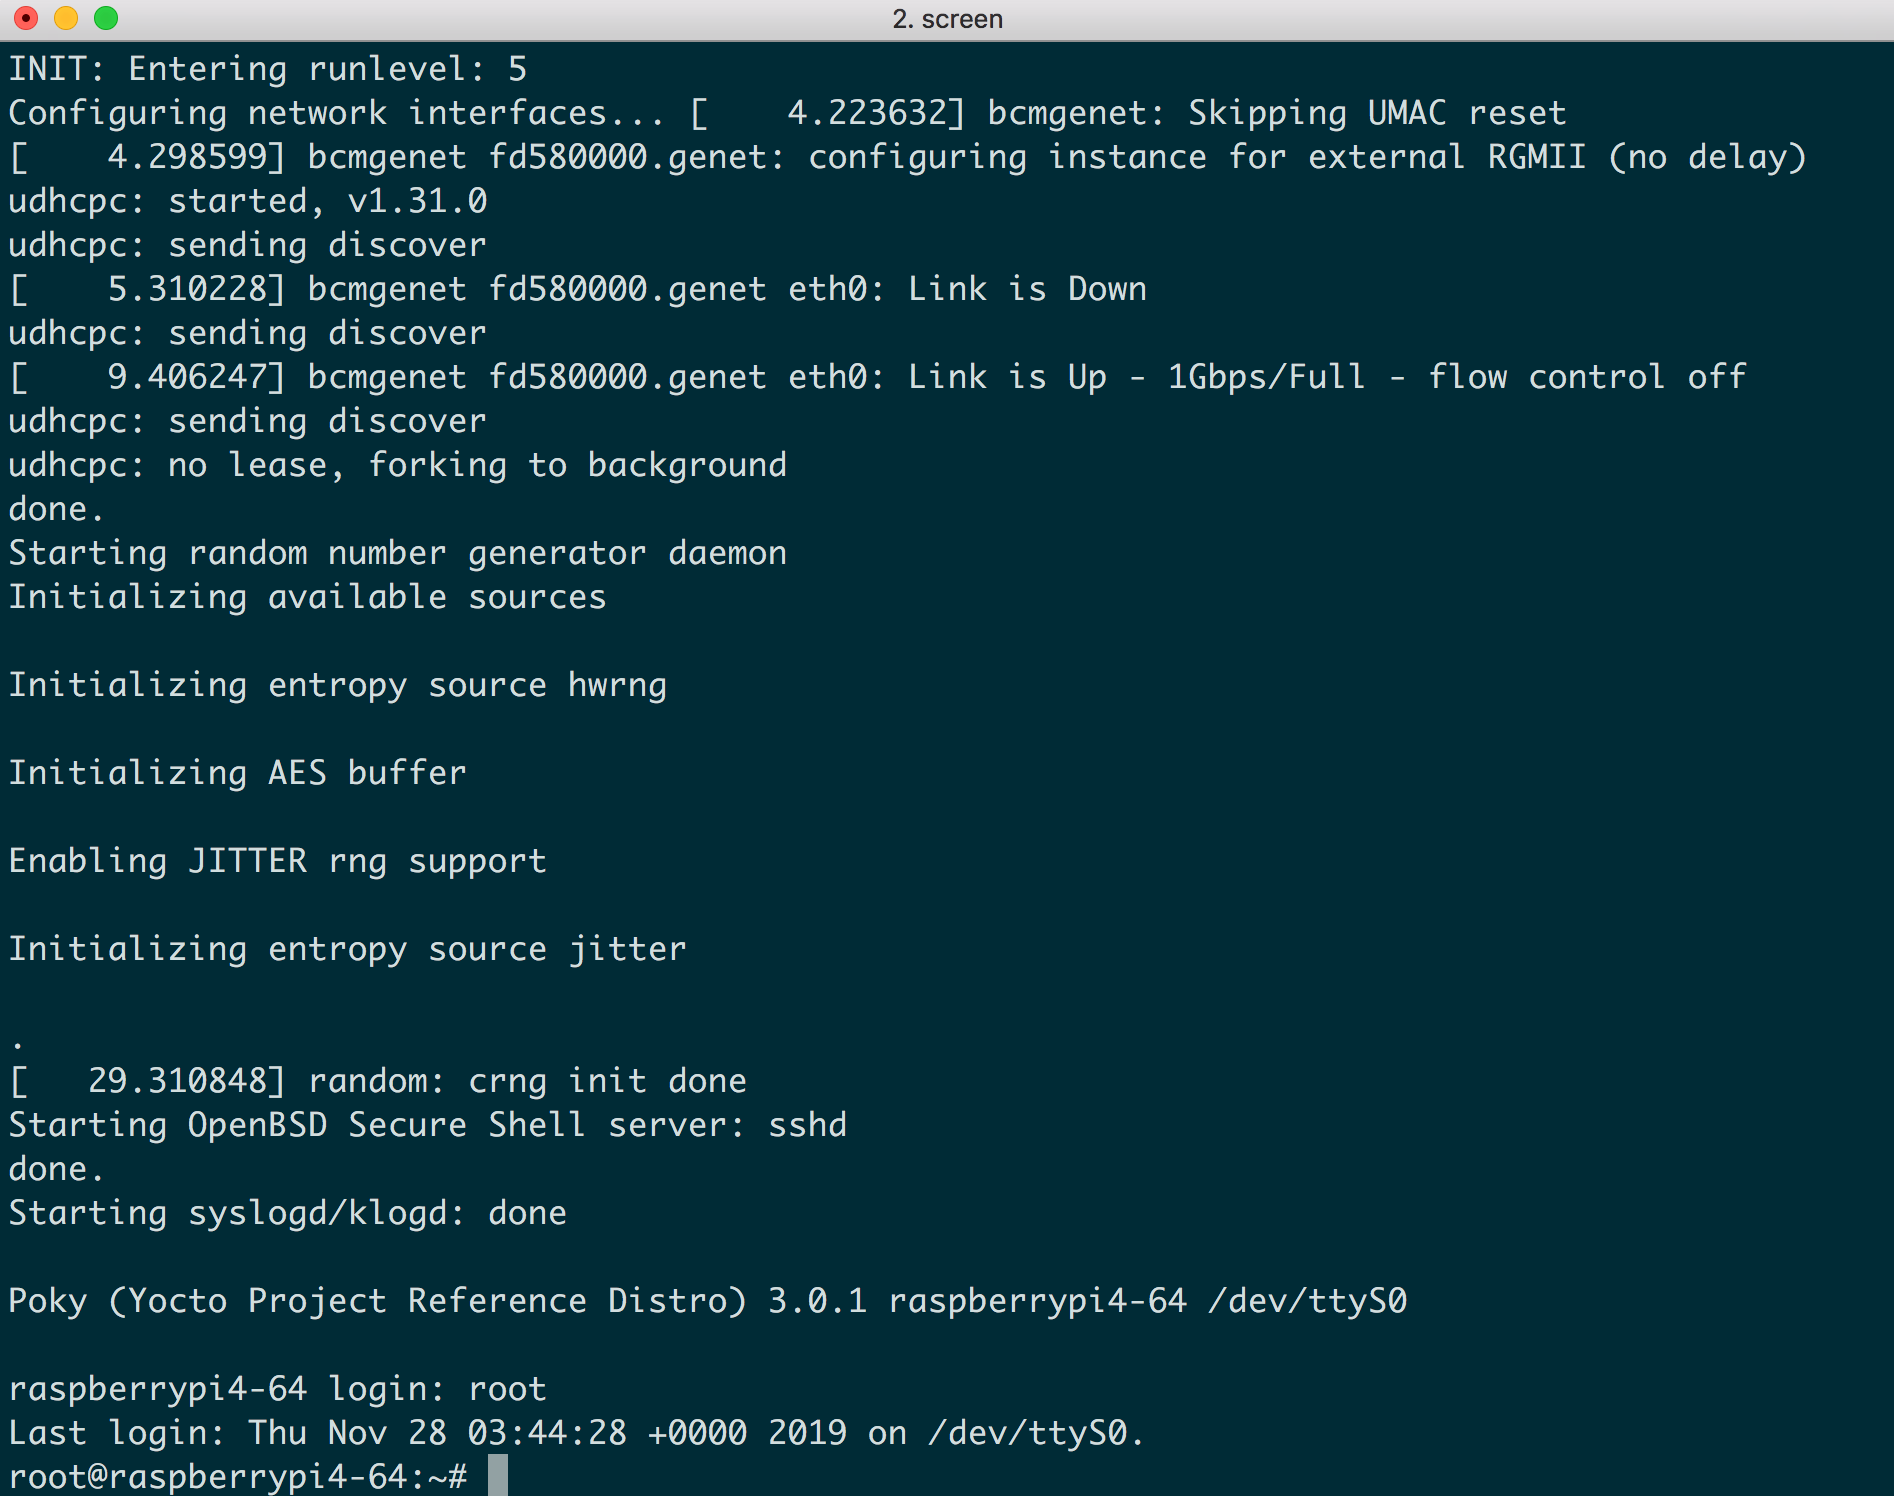
The username and password are:
username : root
password : [no password required!]
Don't worry about messages like udevd[114]: could not create /run/udev: Read-only file system and/or FAT-fs (mmcblk0p1): Volume was not properly unmounted. Some data may be corrupt. Please run fsck.. The former is simply due to the fact that udev doesn't know that /dev/mmcblk0p1 is not read-only, and the latter is apparently a harmless error related to a dirty bit in the FAT filesystem.
One of the problems I ran into originally was not specifying the correct kernel to load during boot-up. I was trying to load a root filesystem with 64-bit binaries when I had a 32-bit kernel. If you run into the same problem, see the following subsection. If not, you can skip ahead! We'll cover how to create your own recipes to modify some very pertinent system files before our root FS is even created.
8.3 IMPORTANT: Example of 32-bit Kernel Loading Root Filesystem with 64-bit Binaries
When I was first trying to get the 64-bit version of the kernel working, I inevitably found myself in error city. As an aside, I've been doing this whole embedded system thing for a long time. But no matter how well I think I know something, there's always some obstacle when I change one little thing or try something new. The key is to be persistent and not get discouraged!
There were a few things I had to adjust with config.txt and cmdline.txt. However, the nastiest error I got was: /sbin/init exists but couldn't execute it (error -8). The full error message is shown below. As you can see, the kernel finds the SD card at mmcblk0, reads the two partitions (p1 and p2), and mounts the root filesystem as it should. But then when it tries to start initilization, it panics like any unhappy kernel does.
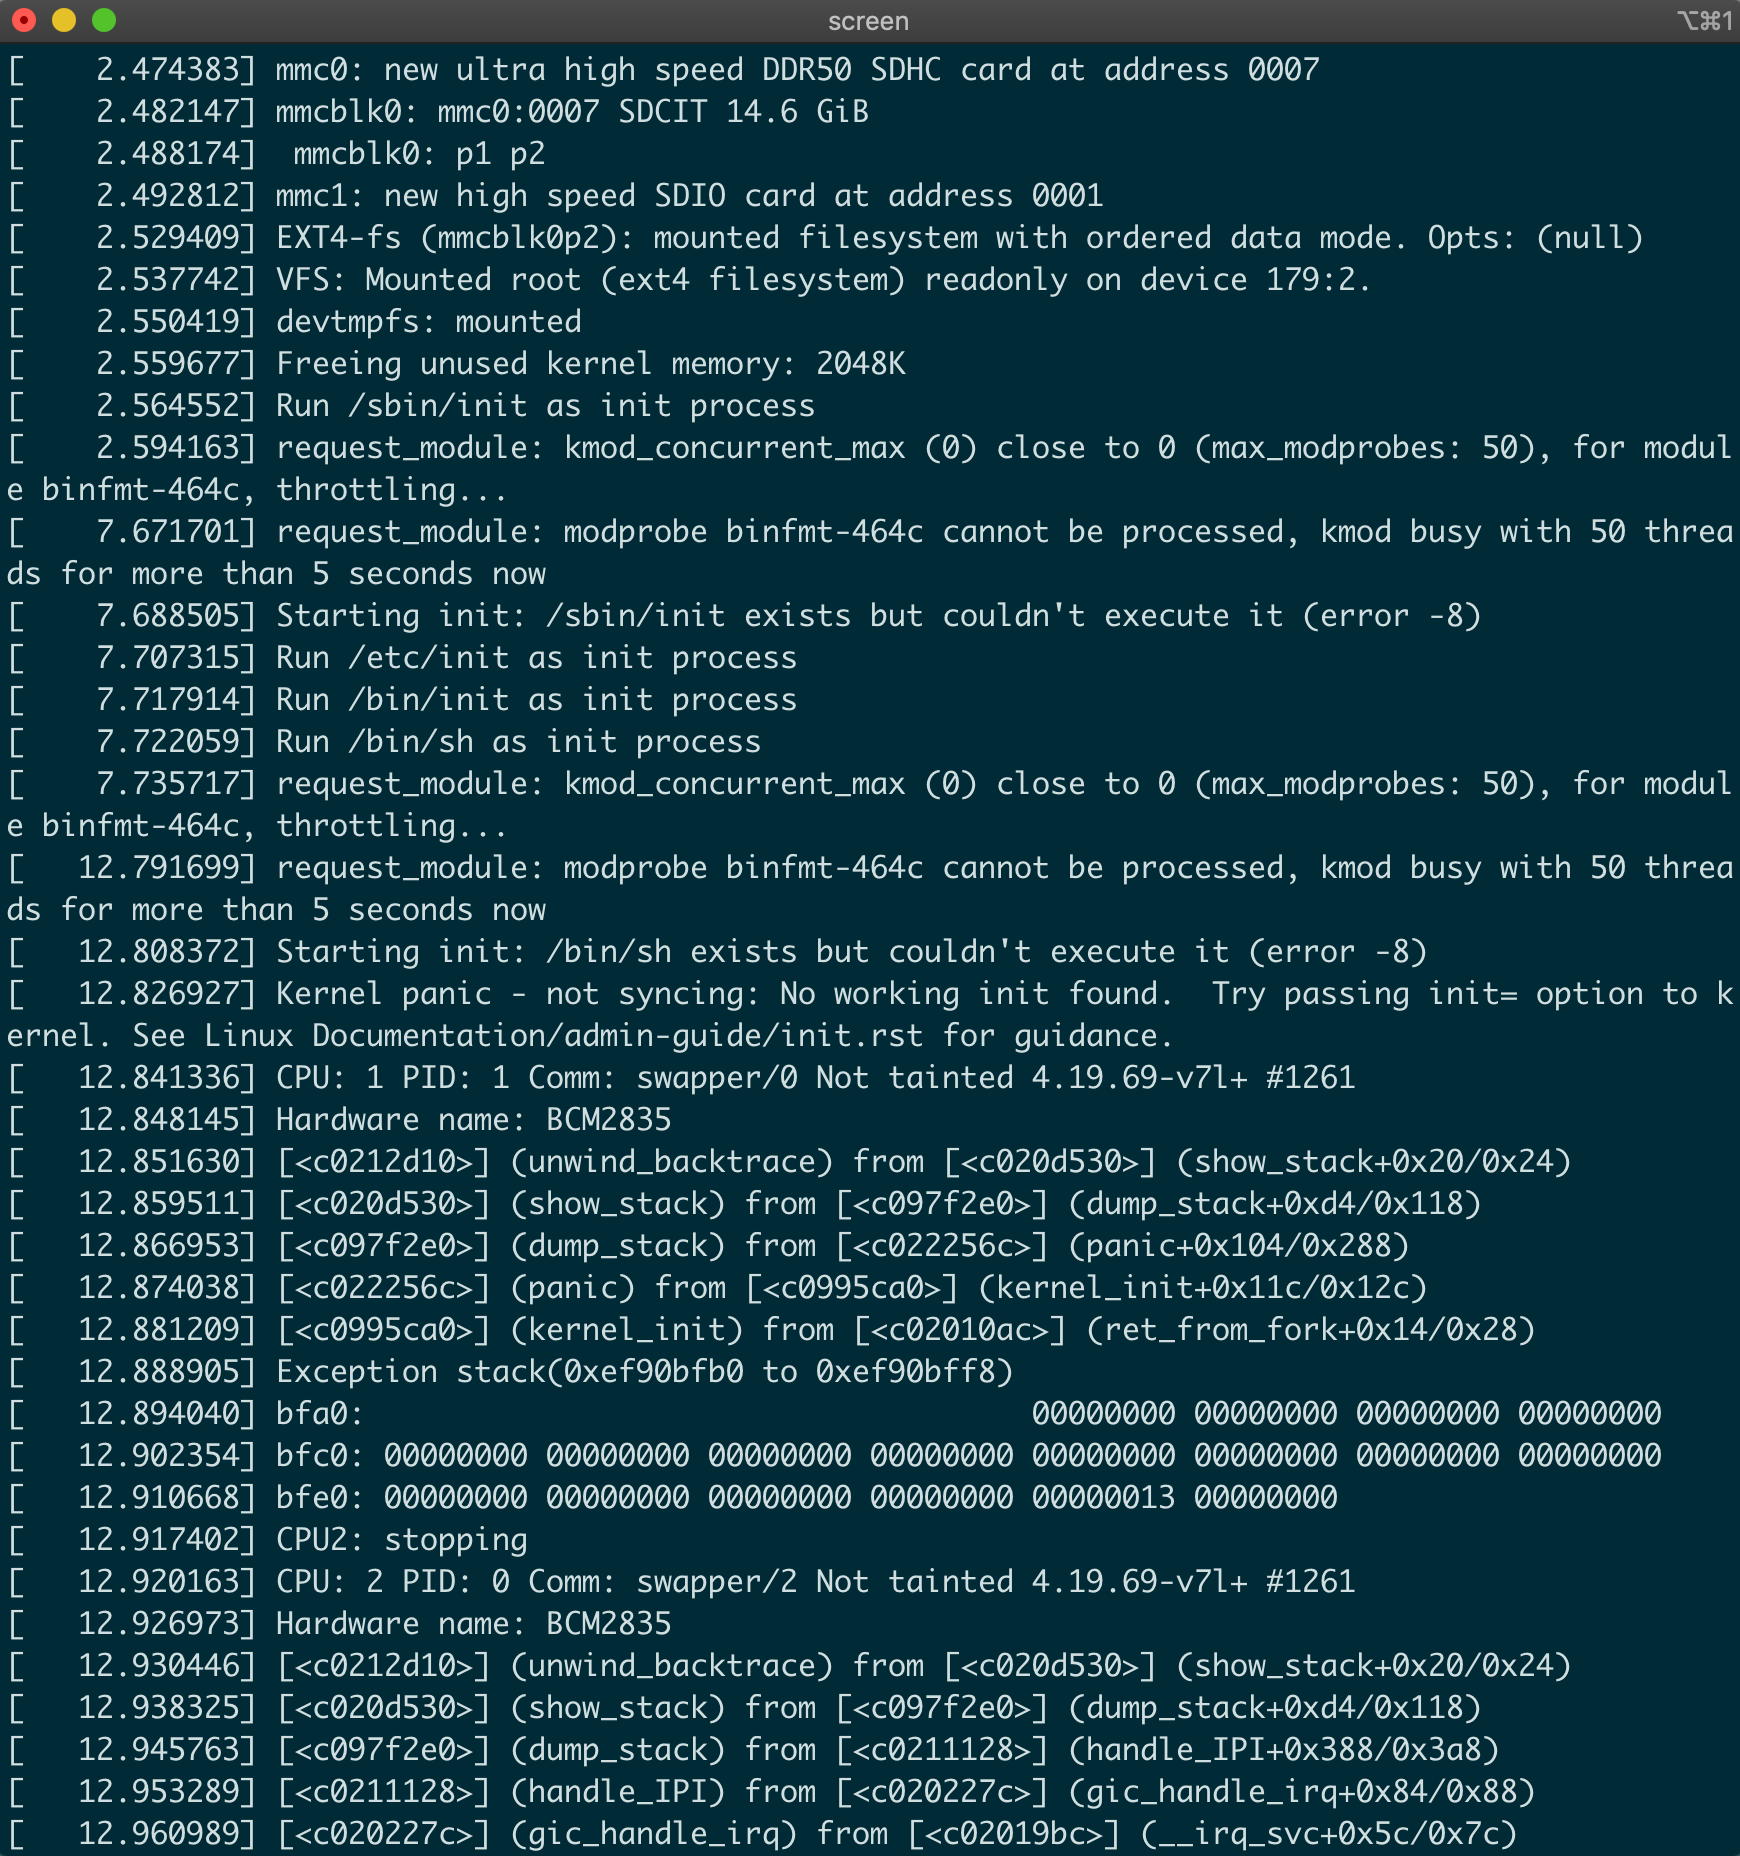
I did a little digging through the kernel messages and the forums, and as I suspsected, this meant the /sbin/init binary that the kernel was trying to use was not executable. But there are multiple reasons why something might not be executable, right? Permissions is the first thing that I usually think of. So I checked that and found they were fine (as seen with an ls -latr.

Further, the file command showed that it was indeed a 64-bit ARM ELF file, which is what I expected. So what was the problem?
Well, it turns out that the problem was that I had copied the image that was generated by the Yocto build to the wrong file name on the SD card. I had copied it to kernel8.img on the BOOT partition of the SD card instead of kernel.img. So basically what was happening was that a 32-bit kernel was trying to load a 64-bit root filesystem!
You may complain about the nomenclature. How can a rootfs be 32 or 64-bit??? Well, if the executables in the root FS are 32-bit, then it's reasonable to call it a 32-bit root FS. If they are 64-bit, then it's a 64-bit root FS. If there are mixtures of the two, well...then it gets a bit tougher.
← Previous ... Next →